Vegan Chocolate Chip Cinnamon Hot Cross Buns
Happy Resurrection Sunday! The Lord is good! It’s been a wild year so far and it’s amazing to look back and see God’s presence sprinkled throughout my random life bits. Many people spend this time in their own way and oftentimes it’s a time for families to gather, remember and celebrate the occasion. As usual, I’m celebrating with something sweet and baked.
What are Hot Cross Buns
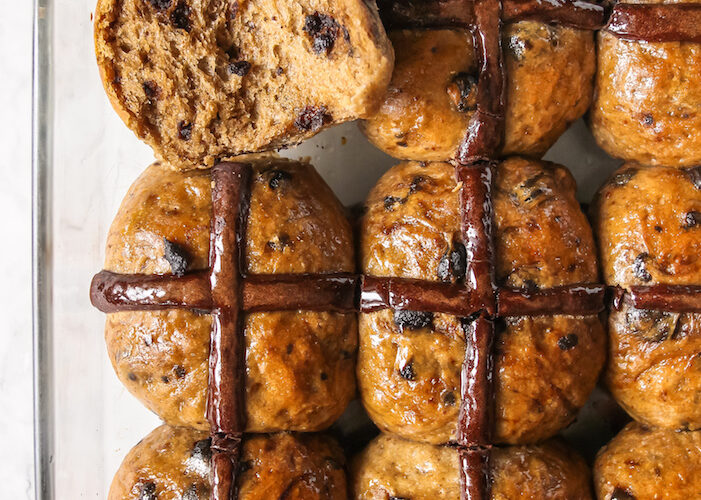
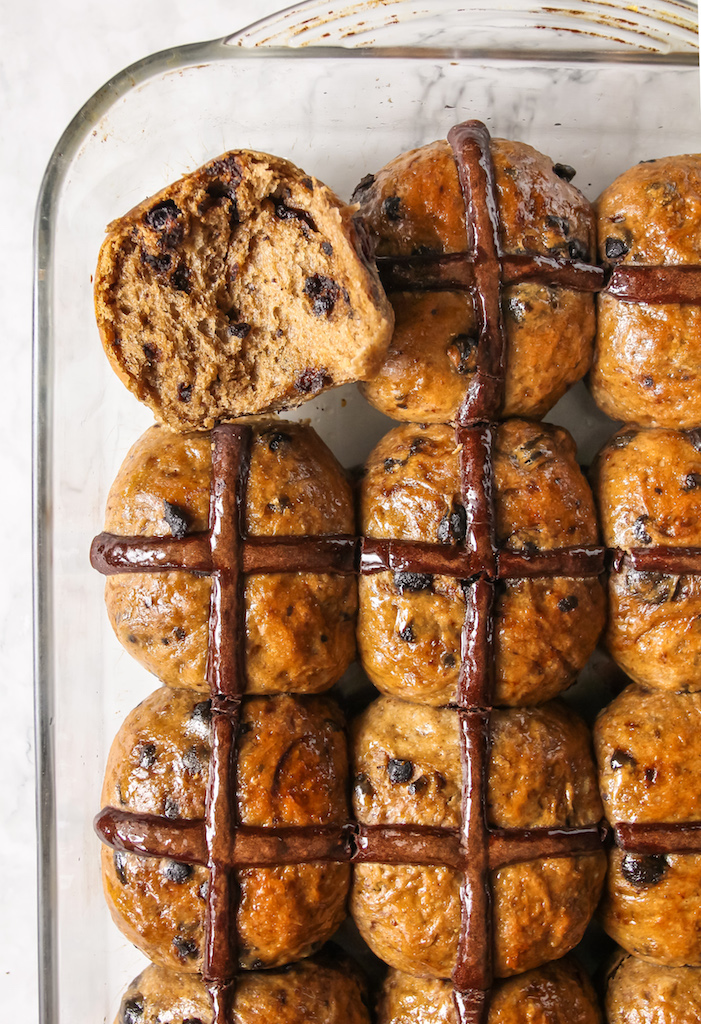
Hot Cross buns are soft sticky spiced rolls usually pockmarked with dried fruit and marked with a cross. The buns originated in Ireland but have spread as a tradition in the UK, all the way to New Zealand. Of course, the cross in the center symbolizes the cross of Jesus while the spices represent His embalming. They’re best eaten warm with a thick slab of butter to complement the sweet spiced bun.
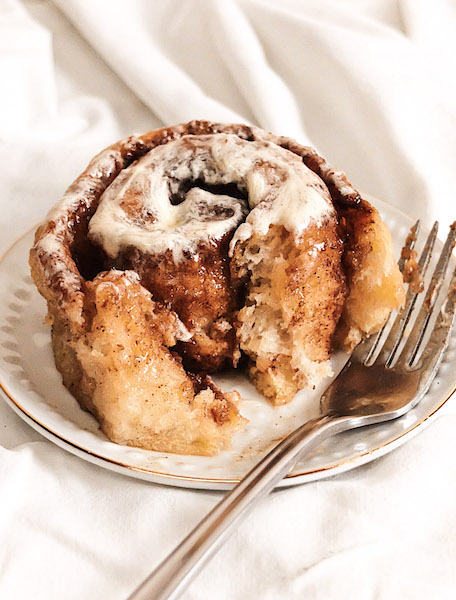
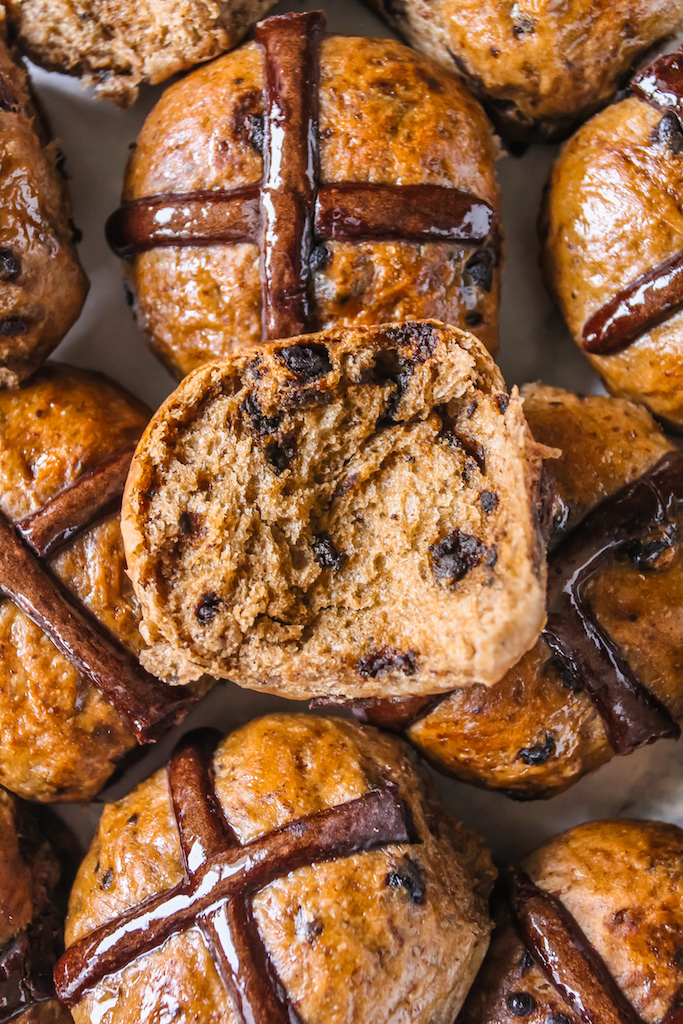
Instead of the traditional hot cross bun, I changed up the flavors to make it more family friendly. Living in a household of chocolate lovers, I naturally found a way to incorporate it here. These chocolate chip cinnamon hot cross buns are soft, fluffy and studded with melty chocolate chips. Laced with cinnamon for a soul warming treat perfect for the occasion.
How to Make Vegan Chocolate Chip Cinnamon Hot Cross Buns
If this is your first venture into bread, this is a good place to start to learn a few basics. Make sure to read through the notes section too for more tips.
Make a vegan “egg”: For this recipe, I will be using flaxseeds which helps bind the dough together. If you’re not vegan, you can substitute this with 2 eggs but I recommend you try the recipe as is. All you have to do is mix the flaxseed with 6 tablespoons of water and set it aside for a few minutes. That’s it! As a rule of thumb, 1 egg equals 1 tablespoon of flaxseed + 3 tablespoons of water.
Mix the dry ingredients: In a big bowl, mix the bread flour and sugar. You can also use all-purpose flour instead but take note that you will get a less airy, chewier bun compared to the bread flour version.
Mix the wet ingredients: Grab a large measuring cup and fill it with the melted butter and milk. Sprinkling the yeast on top of the milk mixture and watch it bloom for a minute. I do this to double check that my yeast is active and I generally enjoy watching the yeast foam up because science. Pour this and the flax egg into your flour mixture then knead away.
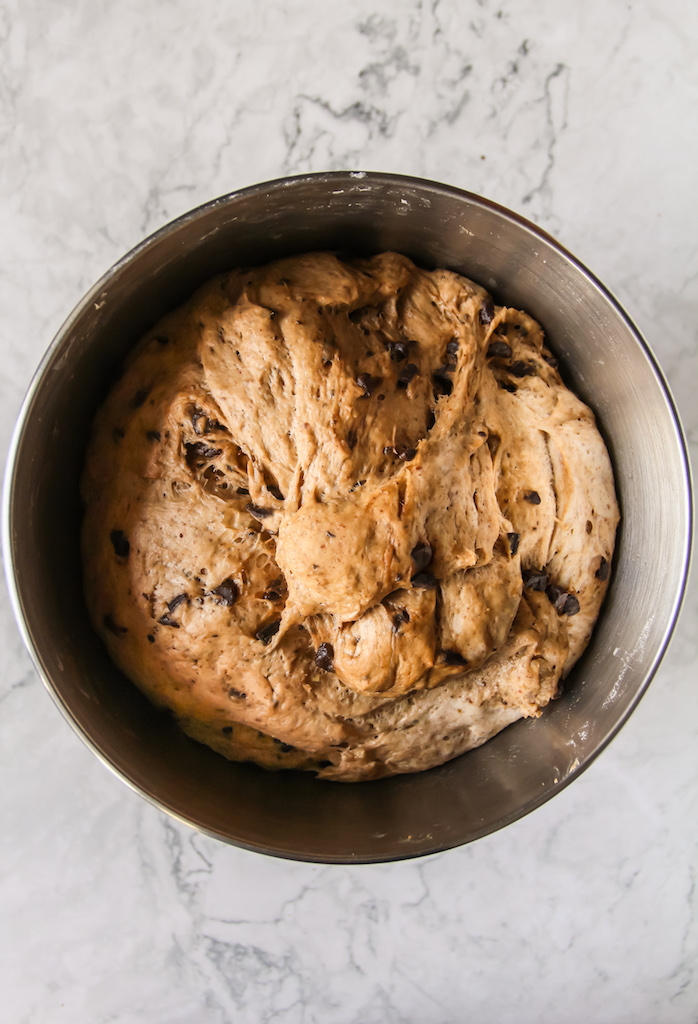
How to knead using a mixer: This is the simplest and most effortless way to knead bread. Also, it is the method I use most when I want my hands to be free. Knead the dough using the hook attachment, until everything is well incorporated and the dough starts to pull away from the sides of the bowl.
How to knead by hand: Kneading by hand is the best way to get the feel of the dough and is good practice for future bread baking. Start off with mixing the dough in a large bowl using a wooden spoon. Once everything is more or less incorporated (the dough will be sticky), transfer it to a lightly floured surface and begin kneading.
Start with pushing down on the dough and away from you with the heel of your hand. Fold the dough in half towards you and repeat the process. You can also give the dough a quarter turn every once in a while or sprinkle a bit of flour if things get sticky. Just make sure to avoid adding too much or else your dough will become dry when it bakes. You’ll know when the dough is ready when the surface is smooth, plump and silky. If you’re a more visual person this is a great video to watch.
Chill and do proof #1: Plop the dough into a greased bowl and leave it to rest for 1 hour in the warmest spot in your house. This builds the air pockets making the buns light and fluffy.
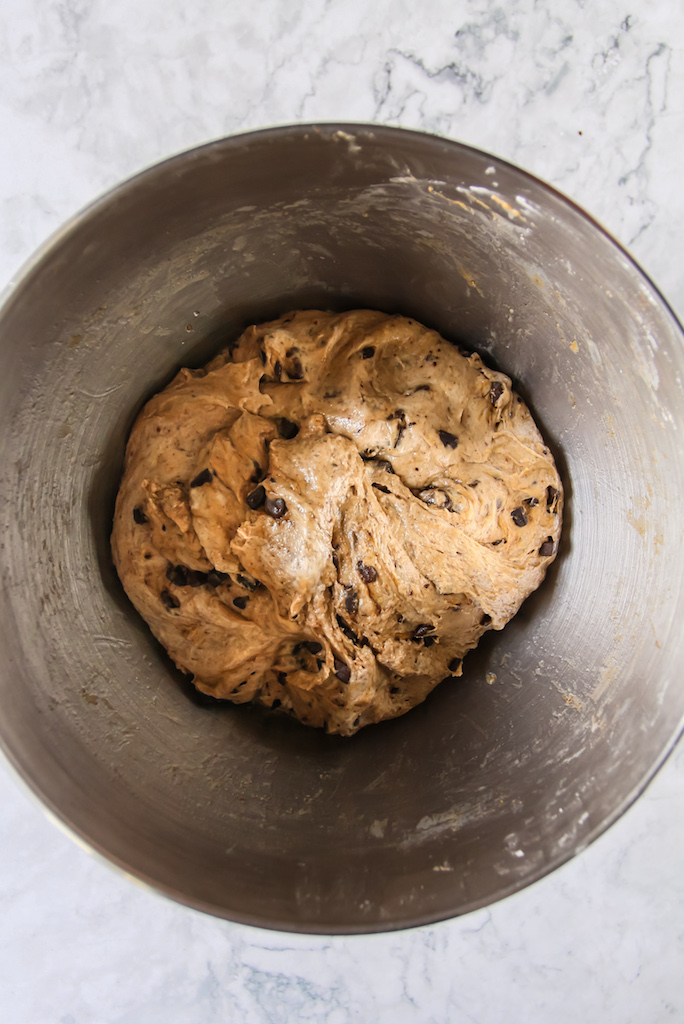
Add them chocolate chips and do proof #2: Punch your risen dough and knead in the spices and chocolate chips. When everything is mixed, transfer back to the greased bowl and proof for a second time. Proofing the dough twice gives the bread better taste and texture once it’s baked.
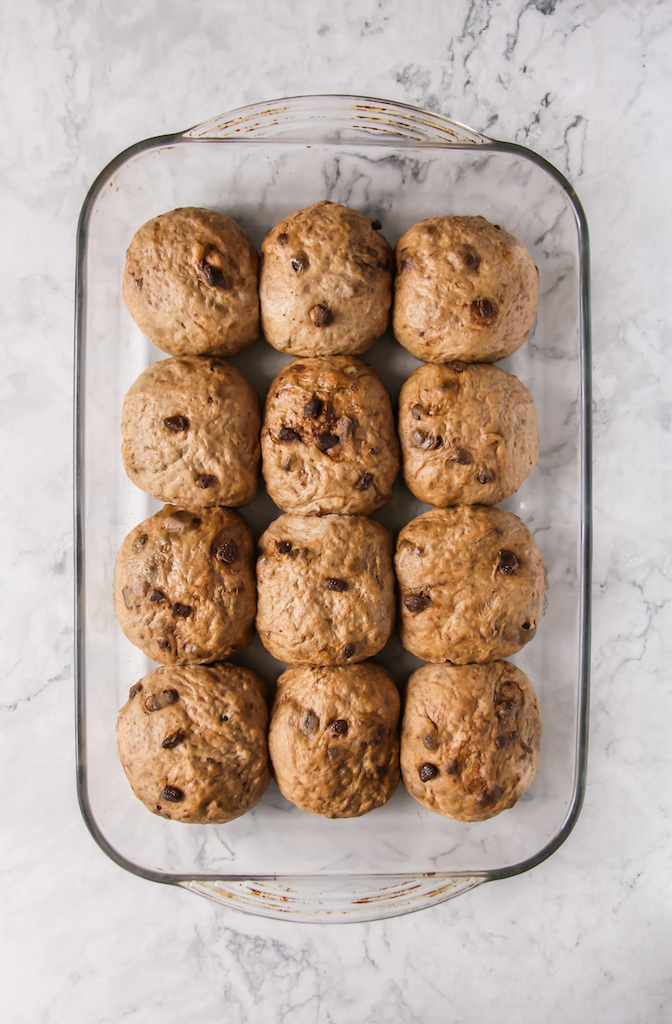
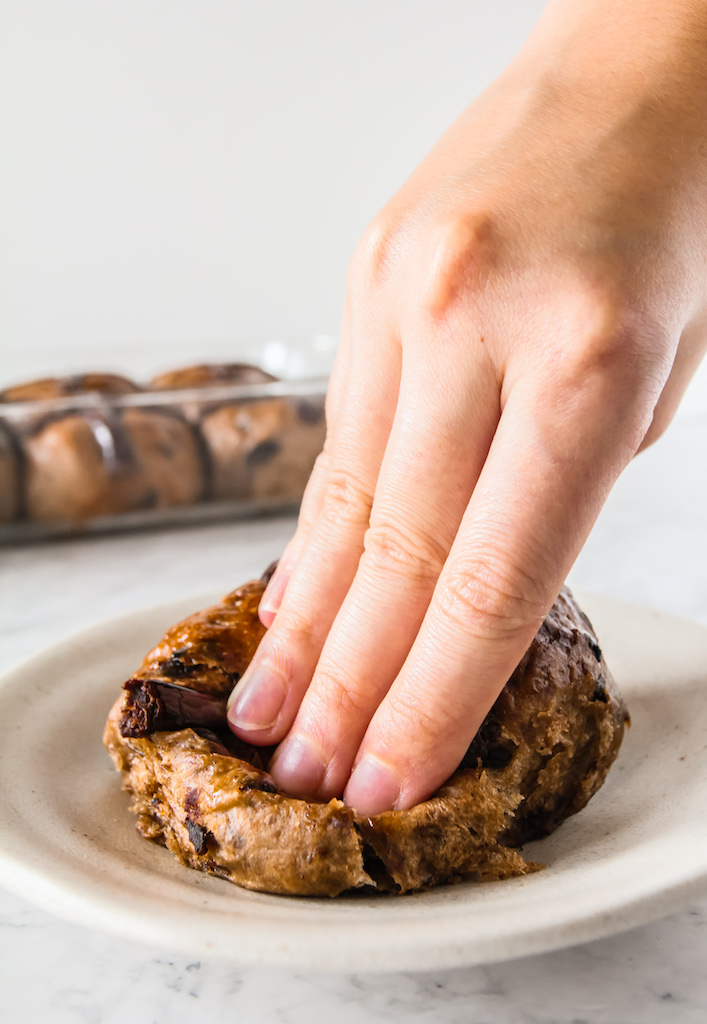
Creating the bun shape: When your bread has doubled in size and the dough springs back slowly after poking it, you know it’s ready. To create a bun, fold the corners of the dough into itself. Almost like you want to hide something in the middle of the dough so you’re wrapping it. Flip the dough over so the seam side is down and use the curve of your hand to roll the ball, creating a tight smooth surface. For more visual cues, you can watch this.
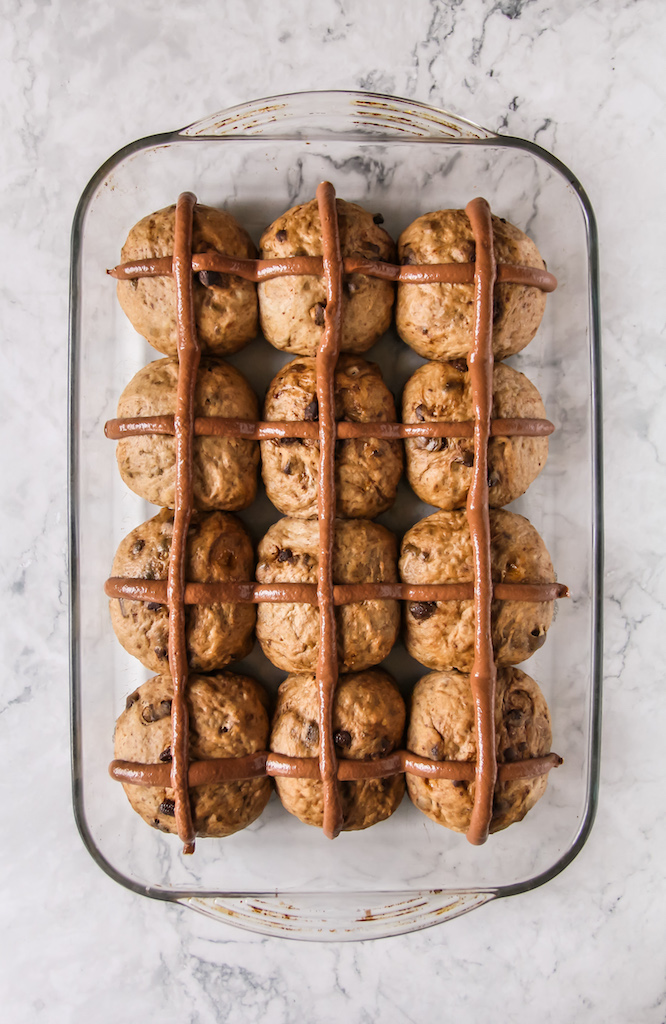
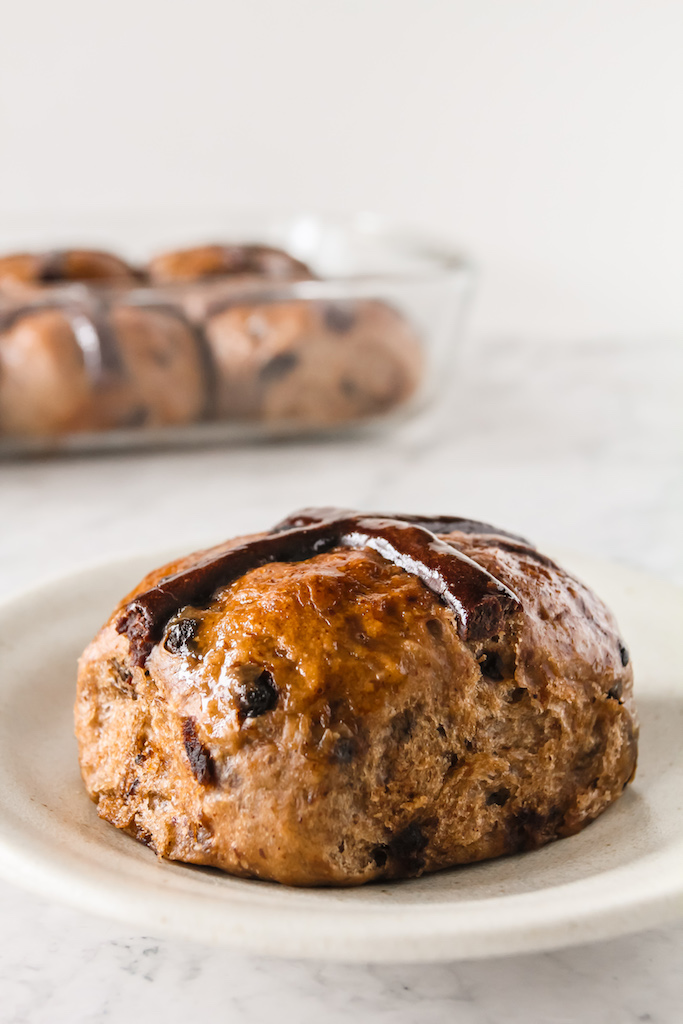
Last Proof #3: Cover the buns and let them rest for the last time. Start mixing your cross mixture then pipe the crosses on each bun right before baking. When the buns are still warm from the oven, brush on the glaze to make the them extra glossy and eat while still warm.
Just A Few More Tips
- Use a weighing scale for the best results. Cup measurements are often unreliable and can add more stress to what should be a tried and tested recipe. Make the switch and I’m sure you won’t regret it.
- If you don’t have bread flour, all purpose flour will work in a pinch. The texture will be slightly less fluffy and airy but it will still be good. (see the photo above for an all purpose flour version of this recipe)
- Set a timer when you’re proofing the dough. It’s easy to lose track of time with the multiple rises so set a timer, do your thing and chill while your bread rises.
- These buns can be made a day ahead of time. Follow the recipe exactly until proof #3. Instead of proofing the buns for a third time, cover the pan with cling wrap, place in the fridge and leave overnight. On the next day, leave the buns on the counter to come to room temperature (around 1 hour) and proceed with the rest of the recipe.
- The buns will keep for about a week or up to one month when placed in the freezer.
- Eat the buns warm with a slab of butter, jam or favorite nut spread. Chocolate hazelnut spread sounds like a winner or dip the bread in coffee for added oomph.
More Easter Baking
If you make these Vegan Chocolate Chip Cinnamon Hot Cross Buns (wow that’s a mouthful), make sure to leave a comment and rating down below, I would love to know how it went. Also tag me on instagram @unit1404 and hashtag #unit1404 so I can see and share your creations.
Follow me on pinterest and tiktok for more baking updates! Catch up with you soon!
Vegan Chocolate Chip Cinnamon Hot Cross Buns
Ingredients
Bread Dough
- 2 tbsp ground flaxseed* ,+ 6 tbsp water
- 65 g vegan butter ,melted
- 300 mL plant based milk ,soy or oat is best
- 1½ tsp instant yeast ,or 2 tsp active yeast
- 525 g (4¼ cup) bread flour* ,sifted
- 50 g granulated sugar
- 200 g chopped chocolate ,or mini chocolate chips
- 2 tsp ground cinnamon
- 1 tsp all spice
- ¼ tsp salt
Cross Mixture
- 45 g all purpose flour
- 45 mL water
- 10 g unsweetened cocoa powder
- 1 tsp granulated sugar
Glaze
- 60 mL water
- 50 g granulated sugar
- pinch of cinnamon or 1 cinnamon stick
Instructions
Bread Dough
- In a small bowl, combine the flaxseed with 6 tbsp of water and set aside for around 5 minutes to thicken.
- In a bowl of a stand mixer fitted with the hook attachment, pour in the flour and sugar. If using instant yeast, add it in this flour mixture.
- In a large measuring cup, mix the butter and milk together. If using active yeast, sprinkle it over the liquid and wait a few minutes for the yeast to activate and begin foaming.
- Pour the milk mixture and flax eggs into the flour and use the mixer to incorporate everything. Continue kneading until the dough starts to come together and pull away from the sides of the bowl. Place the dough in a lightly greased bowl, cover with a tea towel and leave to proof for 1 hour. (See blog post for kneading by hand)
- After the 1 hour, punch the dough, plop it back in the bowl of the stand mixer and add in the spices and salt. Knead until everything is incorporated. Transfer back to the lightly greased bowl, cover with a tea towel and proof for another hour.
- After the 2nd proof, punch the dough and begin shaping into buns. Divide the dough into 12-15 portions. To create a bun, fold the corners of the dough into itself to tighten the back side. Flip the dough over so the seam side is down, form your hand into a C and use the curve of your hand to roll the ball, creating a tight smooth surface. Place the shaped buns into a 9x13in pan and cover with a tea towel to proof for one final hour.
- 30 minutes into the last proof, preheat your oven to 392℉ (200℃) and make your cross mixture.
Cross Mix
- Add all the ingredients in a bowl until a smooth thick paste is formed. Transfer the paste into a piping bag fitted with a round piping tip (I used Wilton 12).
- When the dough is done proofing, pipe a cross into each dough. Place the buns in the oven and bake for 20-25 minutes or until golden brown, rotating the pan halfway through for even browning.
Glaze
- Combine all the glaze ingredients in a small pot placed on medium heat. Heat the mixture until the sugar is fully dissolved and a runny almost clear syrup has formed. If using a cinnamon stick/bark, remove after syrup is off the heat.
- Let the baked buns cool for around 10 minutes then brush each bun with the glaze. Wait for a few minutes for the glaze to set, serve the buns warm and enjoy!