The Ultimate Classic Buttery Soft Pretzels
Do you know that smell when you pass by a pretzel shop? The warm smell of butter and freshly baked bread that wafts from the store’s doors compelling us to pull out our wallets. This is exactly the same smell you’ll get if you make these.
My mom had a pretzel phase where she would buy toasted almond pretzels every week nonstop for about 2 months! I know crazy. But I do have to hand it her, they did taste good and were extremely addicting and if there’s anything I know about my mom it’s that she is a snacker. These were made with her in mind and my family was ever so willing to indulge in the extra carbs.
A Couple of Words on Pretzels
What people don’t say is how messy making pretzels can be! My first attempts were utter chaos with flour and baking soda glops all over my kitchen floor. To top it all off, I had major problems with it sticking to the pan. Not very ideal. Thankfully, I went through all this mess so that you don’t have to make the same mistakes. If your aim is a neat pretzel making experience with zero hassle please read on.
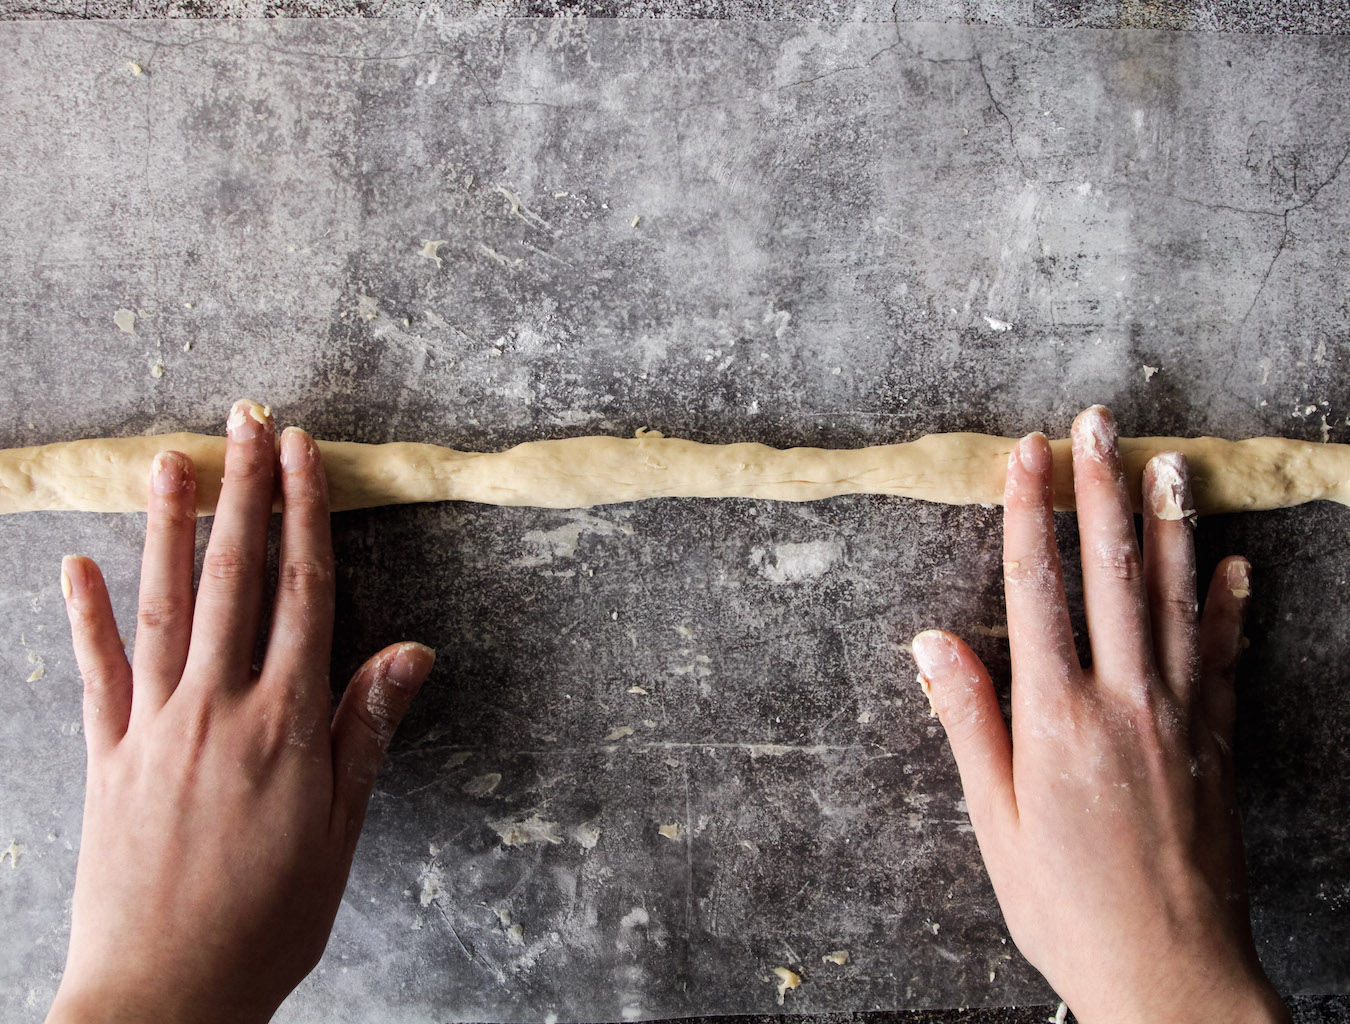
- This is a no knead dough. It will be naturally sticky due to all the milk and butter but will become more pliable after its first rise.
- When shaping, be very minimal with the flour. You will need the friction in order to make it easier to roll.
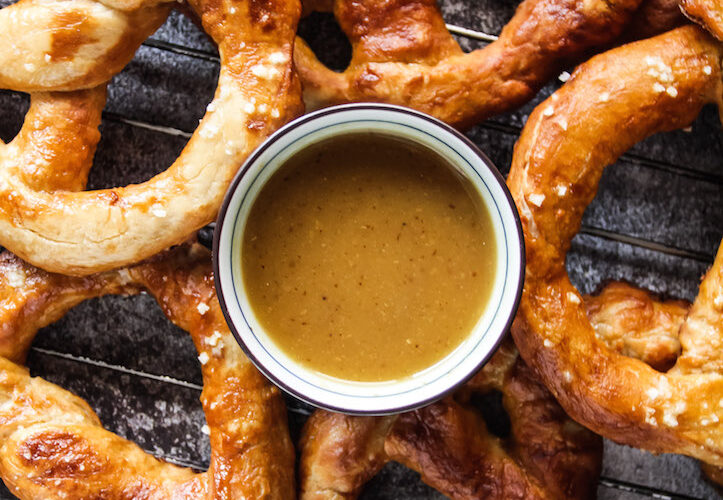
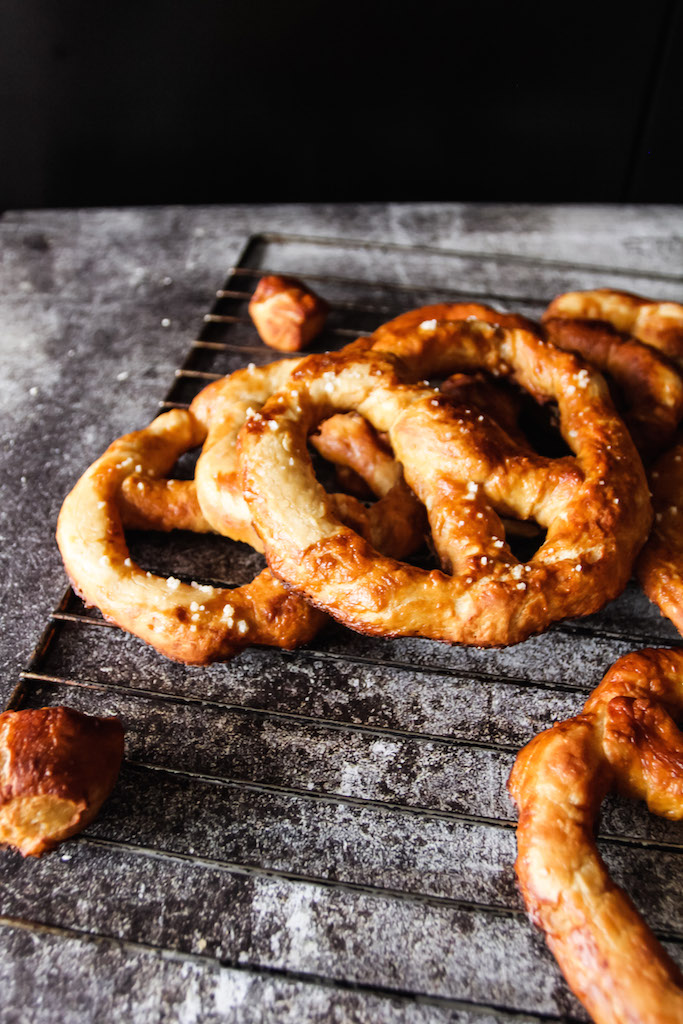
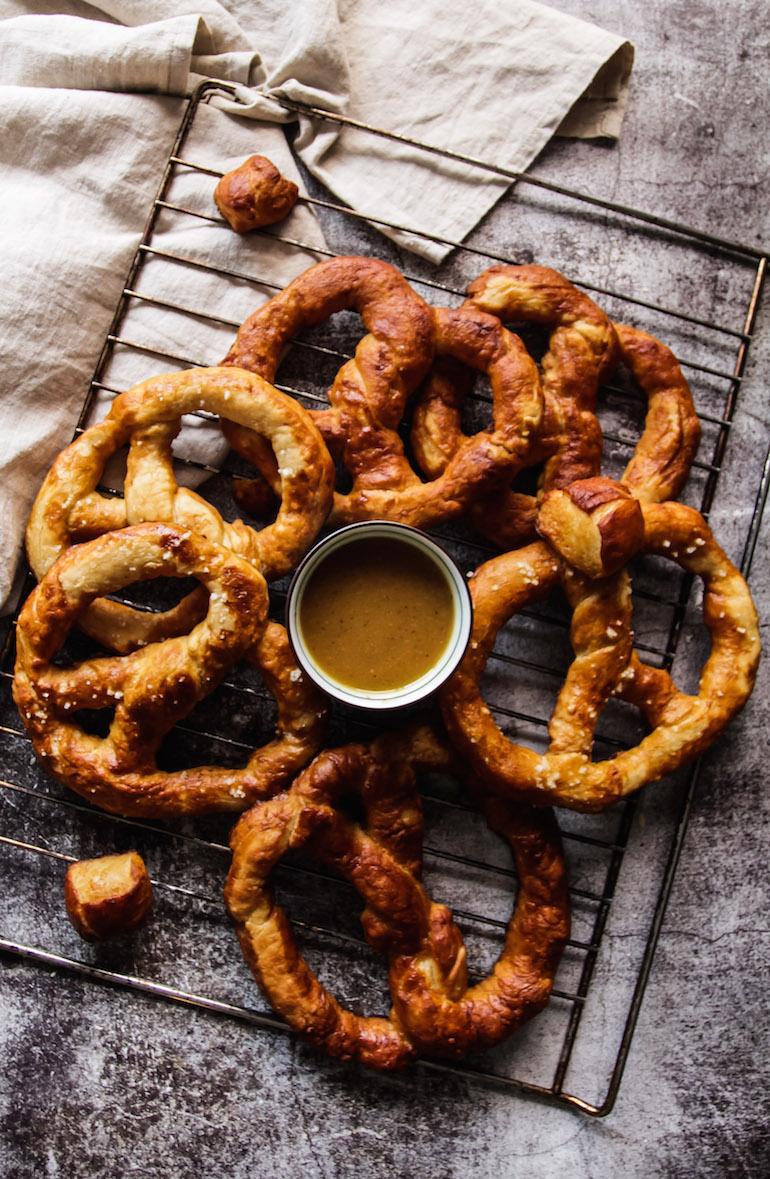
- Pretzels are traditionally soaked in a lye bath which gives them their traditional golden hue, chewy crust and toasty flavor. But let’s face it, lye is corrosive and a hassle to find. I opted to use a baking soda bath which gives us the same results. A 10 second dip is all that’s needed. Too long and the pretzels develop a bitter flavor.
- After dipping the pretzels in the baking soda bath, try to drain as much of that liquid as possible. I found that using a wide slotted spoon (practically as wide as my pretzel) did the trick. If you don’t have something as wide you can use 2 slotted spatulas or spoons as a pretzel cradle. Alternatively, you could drain the pretzels on a wire rack but that would mean transferring them twice so I don’t recommend this method (extra dishes? no thanks).
- I found that using silpats/silicone mats the best way to line your pans. They make lining a quick affair and there is no chance of any bread gluing on to your pan. Another method is to use heavily greased parchment paper. I found that this works exactly the same as heavily greasing a nonstick baking pan. There will be a bit of adherence but its quite easy to remove. Take note: Don’t use wax paper! The pretzels stick to them like crazy and you end up eating waxy bread.
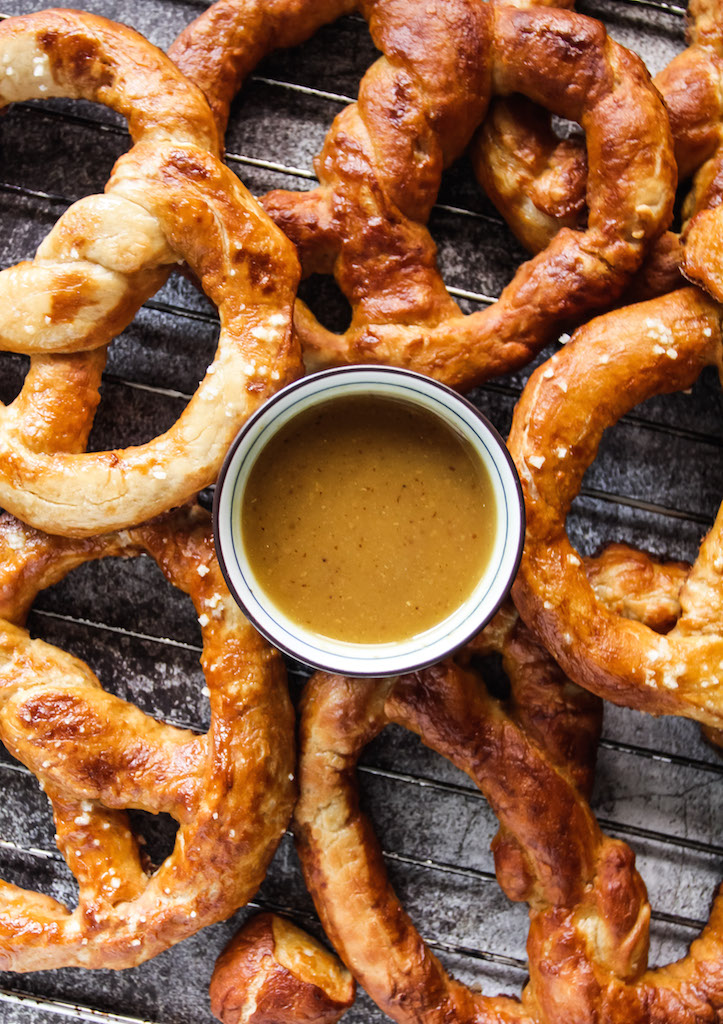
- Lastly, say yes to the butter bath. It gives the pretzel a beautiful sheen and that quintessential Auntie Anne’s flavor.
This is a great base recipe so feel free to play around with it. They can be shaped in any way you please from pretzel bites to twists and can be coated with anything your heart desires (if you want a more detailed guide on shaping this is useful). Some days I cover these in cinnamon sugar and others a sprinkling of sea salt. You do you. I usually stick to the sweet route because that’s what my family prefers but let me know your amazing combinations down below.
The Ultimate Classic Buttery Soft Pretzels
Ingredients
- 500 mL (2 cups) plant-based milk or fresh milk lukewarm
- 102 g (½ cup) brown sugar
- 60 g (¼ cup + 1 tsp) vegan butter or unsalted butter melted
- 1 tbsp instant active yeast
- 685 g (5½ cups) all purpose flour plus extra for dusting
- 2 tsp salt
- 85 g (1/3 cup) baking soda
- 960 mL (4 cups) water
- 60 g (¼ cup + 1 tsp) vegan butter or unsalted butter melted
Instructions
- In a large bowl or the bowl of your stand mixer fitted with the hook attachment, combine the milk, brown sugar and 60g of melted butter. Sprinkle the yeast and leave to bloom for 1 minute.
- In another bowl, add in your flour and salt and give it a quick whisk. Proceed to add this into your milk mixture and stir until combined and no big lumps of flour are left. Place dough in a lightly greased bowl, cover, and leave to rest for 1 hour or until double in size.
- Line 3 large trays with silicone mats/parchment paper (see notes).
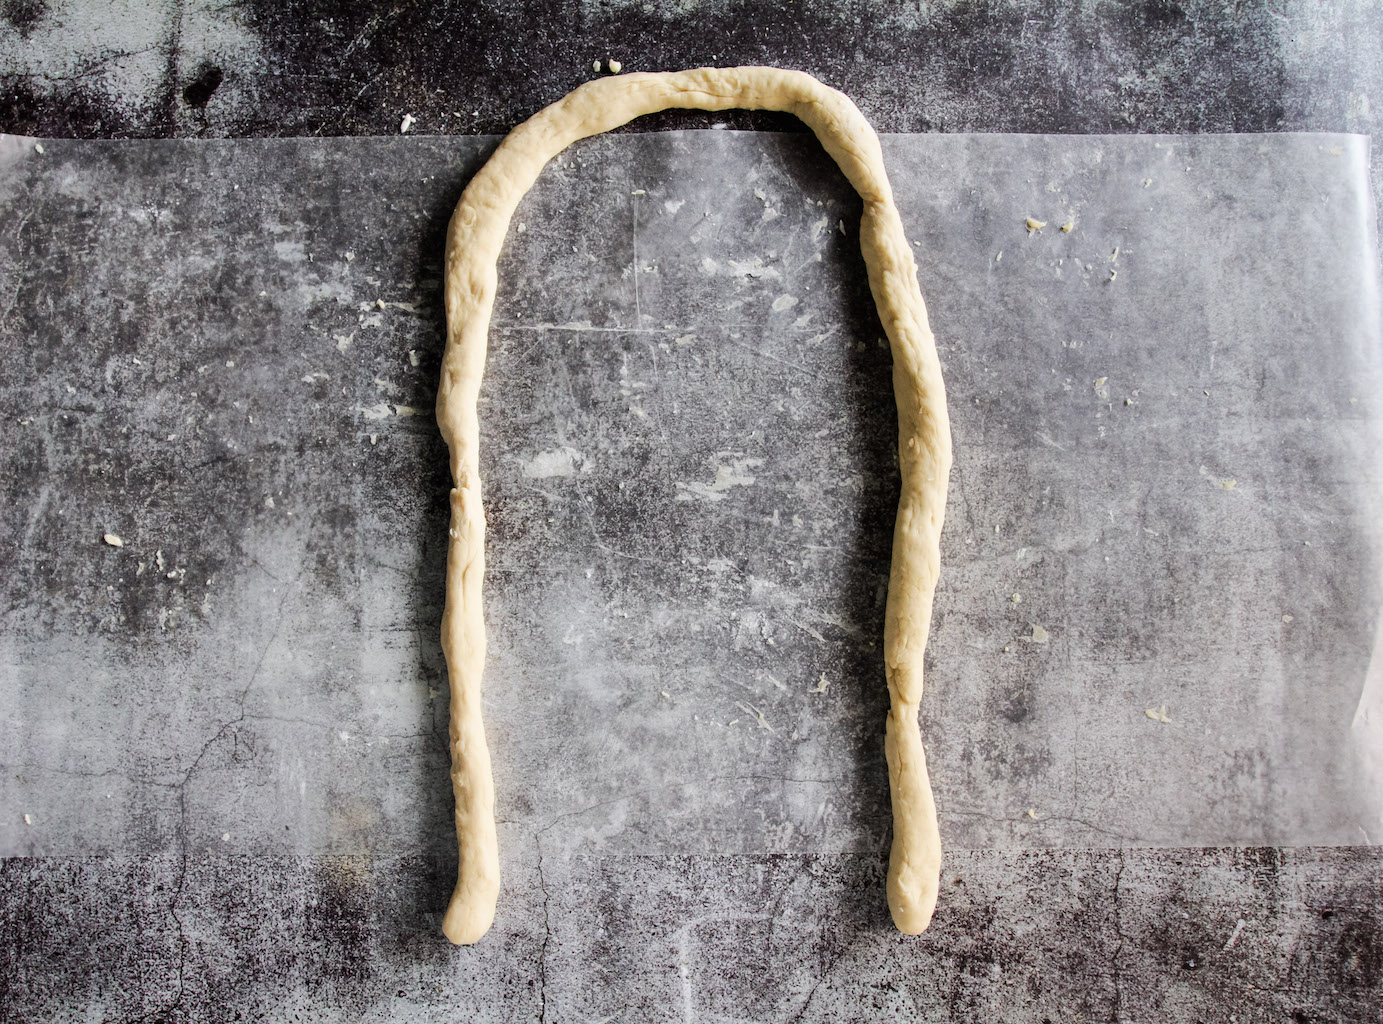
- Punch dough and plop on to your very lightly floured work surface. Evenly portion to 12 parts. Take one portion and cover the rest with a towel. Begin rolling into a thin log, about 30" (76cm) long. Shorter if you want a fatter pretzel.
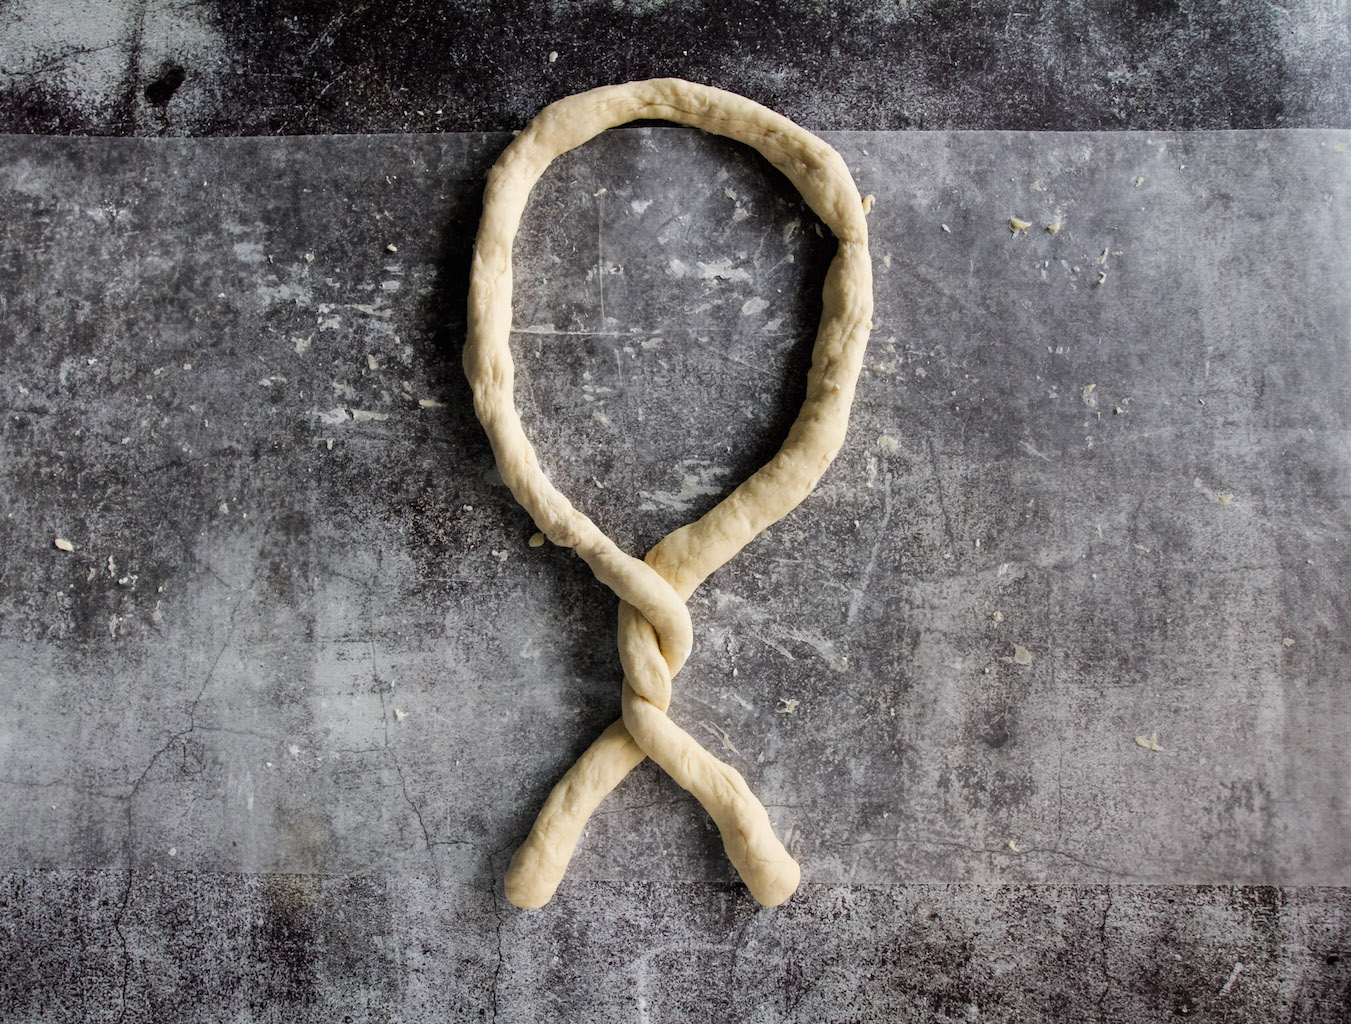
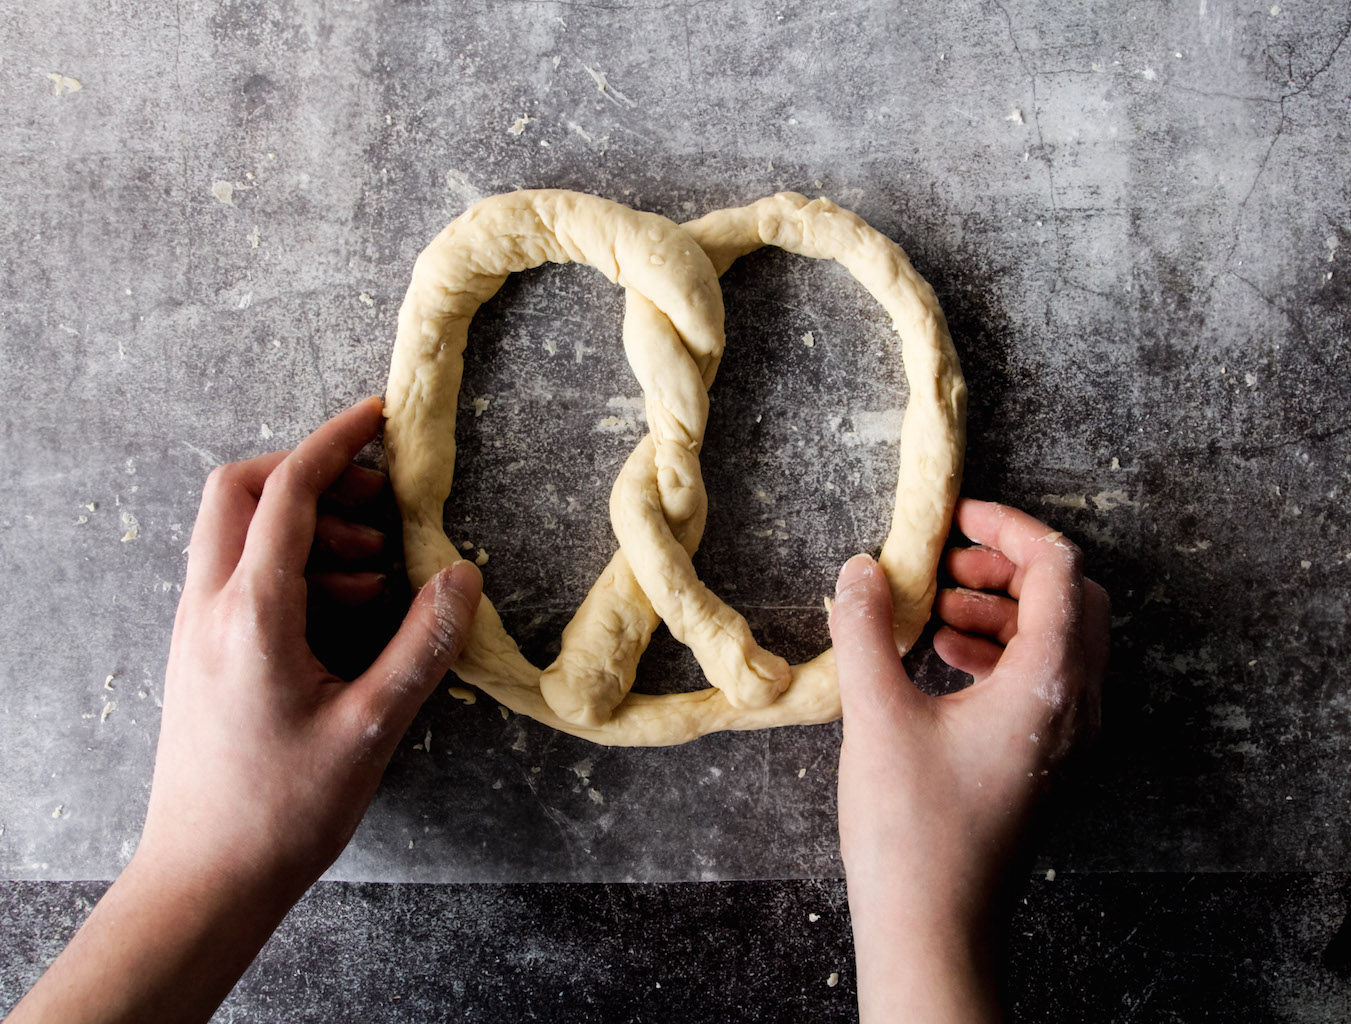
- To make the traditional pretzel shape, form an inverted U, twist the ends twice and flip the ends over to meet the round part of the pretzel. Lightly pinch the ends to seal the shape. Place pretzel onto the lined trays and repeat the process. (see pictures above for shaping)
- Let the pretzels rest for 30 minutes, covered. Uncover then place in the refrigerator for another 10 minutes.
- Preheat oven to 475°F (245°C). Place water and baking soda in a shallow skillet and heat until it begins to steam (no need to boil) and baking soda is dissolved. Once steaming, turn the heat off. Using a wide slotted spoon, submerge pretzel in the baking soda bath for 10 seconds. Drain as much of the liquid and return to the baking tray.
- Bake pretzels for 7-10 minutes. Rotating the pans midway if needed.
- Brush the hot pretzels with the remaining 60g of melted butter and devour.½
Notes

Some items you might need
Disclosure: As an Amazon Associate I earn from qualifying purchases meaning if you use a link to buy something, I may get a commission. All opinions are my own and I only recommend products that I would buy/use myself. Thank you so much!