
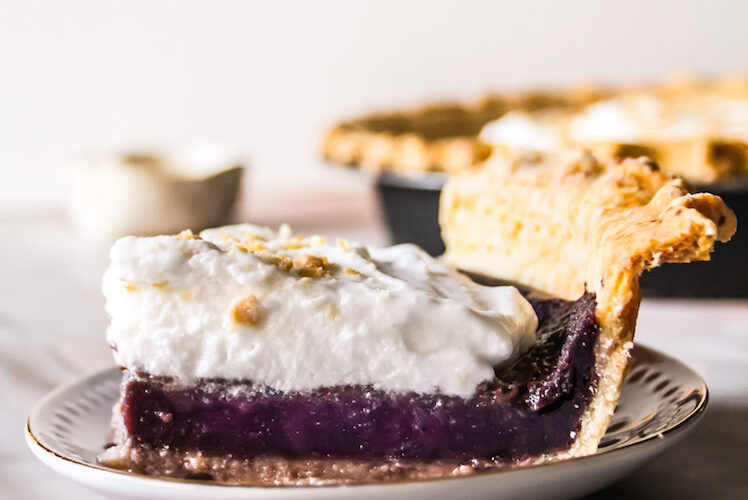
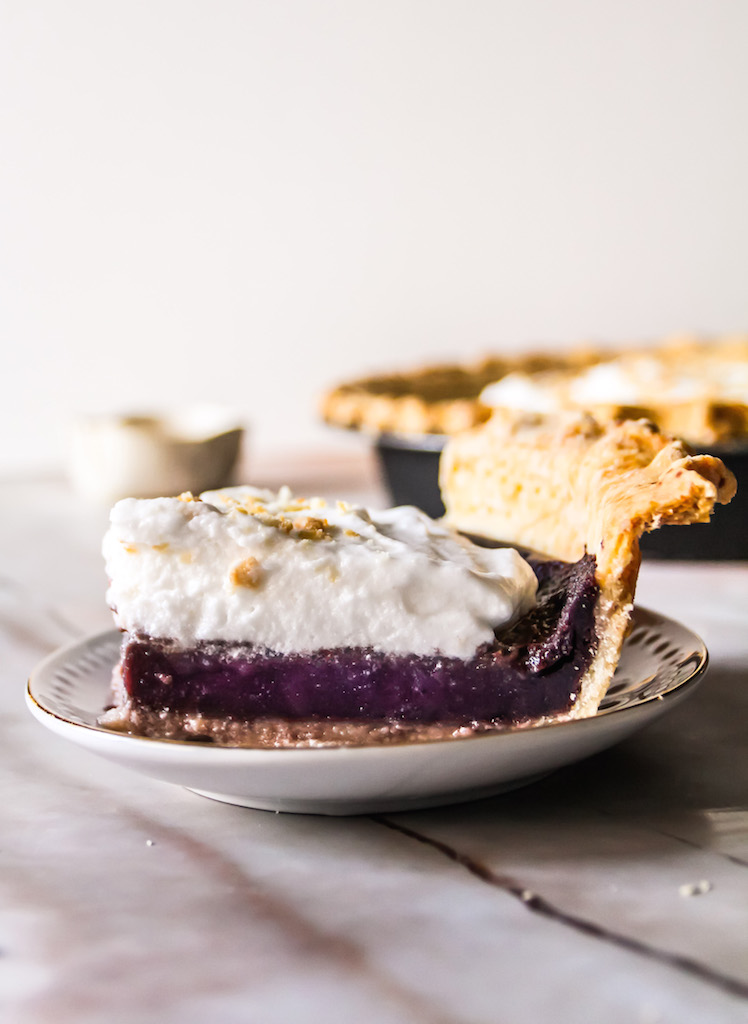
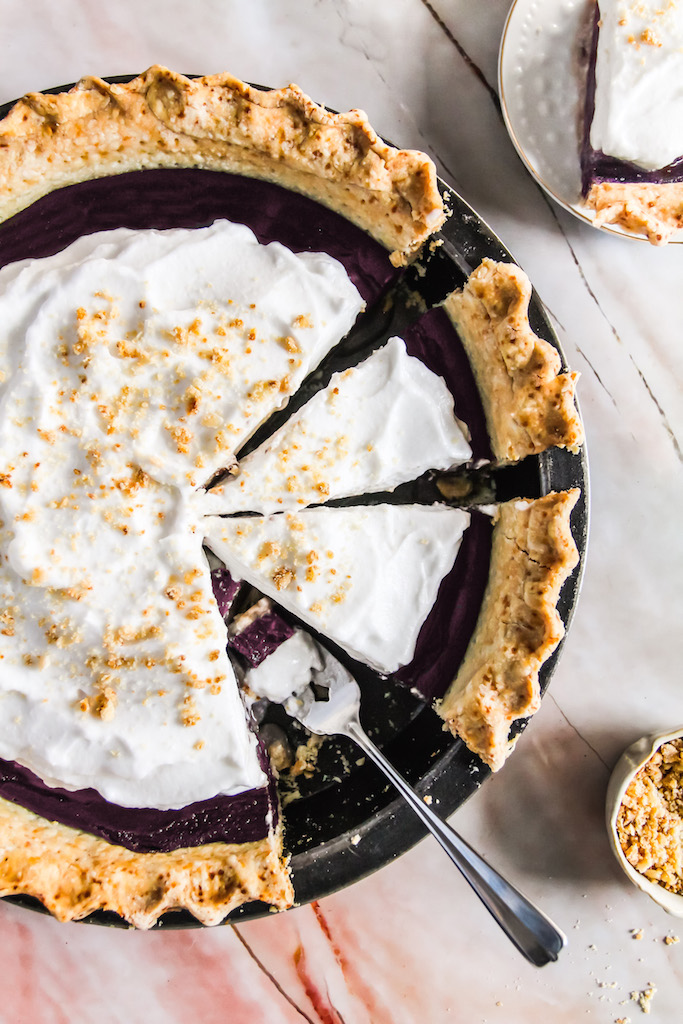
Purple Ube Pie with Coconut Whipped Cream
I know. I admit it. I’m a bit late joining the ube party. Despite growing up with ube as a common ingredient (think ube chiffon cake in every birthday party and ube ice cream on every street corner), I just wasn’t very fond of it. It was only when I got older and tasted some GOOD ube halaya that I fell in love with it. Apparently, it wasn’t because I didn’t like ube but I hadn’t tasted good ube till then. I’m talking about the pure stuff. The real deal. Not the ube flavorings and extracts that are added to mimic the real thing. And once you’ve tried good ube there’s no going back.
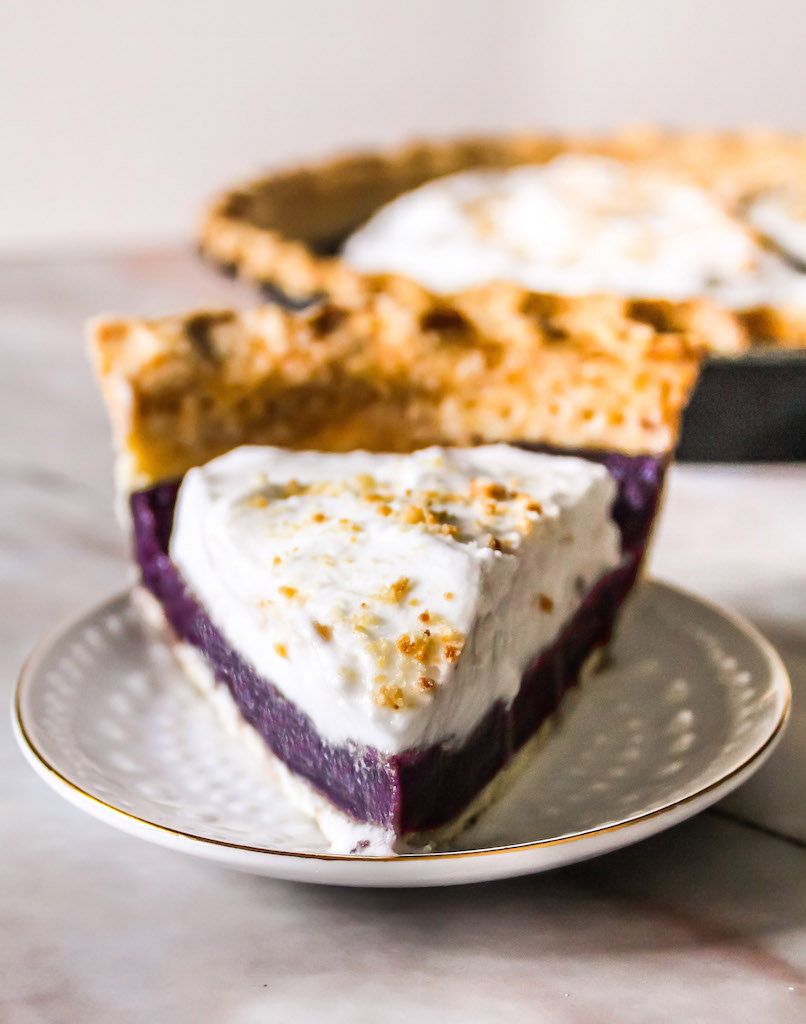
This dessert is a combination of two things I love: ube halaya and pie. Halaya (basically ube jam but so much more) is still one of my favorite ways to eat ube with its velvety smooth texture. I love the purity of it as well. The way it showcases the subtle nutty ube flavor together with the vanilla sweet notes. Imagine all that in a buttery flaky crust topped with whipped cream and you have pie gold!
If you aren’t familiar with ube desserts think of this purple ube pie as a pumpkin or sweet potato pie except for its amazingly vibrant hue. Purple yam aka ube are gnarly looking tubers. Most often their skin is brown similar to tree bark but with a rather supple interior. However, they still need to be cooked in order to achieve a smooth puree. I outlined the best way to cook ube below so that you get the smoothest most flavorful filling for your desserts.
How to Make the Silkiest Purple Ube Filling
Just like there are multiple ways to cook potatoes, many roads lead to cooked ube but some are better than others. I find that boiling is the best and easiest method. Roasting tends to harden the inside flesh in a weird way making it not suitable for mashing. I laid out two methods depending on how much time you have on hand so choose what’s more convenient for you.
- Longer Method ~ 20 minutes (My preferred choice)
Grab a large pot, fill halfway with water (or enough to submerge the ube) and bring to a boil. Meanwhile, wash the ube thoroughly to remove all the soil and dirt then boil with the skin on for 20 minutes or until a fork can be inserted easily and the flesh is very soft. Let cool for a few minutes or if you’re brave start peeling immediately and mash.
Boiling the ube whole is a bit more time consuming but it also ensures that the purple hue, flavor and nutrients of the ube is retained. The reason behind this is due to the skin which acts as a barrier between the water and the purple flesh.
- Quicker Method ~ 10 minutes
Follow the same procedure as above stopping right before placing the ube inside the boiling water. You’ll want to clean the ube, peel the skin and chop into 1″ cubes. Now you can start boiling them until soft, about 10 minutes (the water will turn purple and can stain so make sure to be careful). Drain them thoroughly and proceed to mash them with a masher.
This method is faster since the pieces are smaller. It does lead to a bit of color loss albeit not very much (real ube has the ability to retain its hue quite well). I also find the flavor to be a bit more watered down however, not so notable that you would totally be devastated about it. This method works in a pinch when I’m in a time crunch and need my ube fix. (extra tip: clean your knife and cutting board right away to prevent it from being stained)
Finally, the extra step to achieve that silky smooth filling: before filling the pie, strain the mixture to get rid of any ube lumps. This last bit of straining is optional but is a total game changer if you want the smoothest pie filling. I prefer to strain as the last step since the liquid strains much quicker than having to strain the pure ube.
Just A Few Tips (I’ll keep this short and sweet)
- For the flakiest pie crust use cold ingredients always. I make sure to keep the butter and shortening cold and sometimes go the extra mile by placing my bowl in the freezer for a few minutes. This ensures your crust doesn’t melt and break before your eyes when rolling.
- Another flaky crust tip: Use a fork or a pastry cutter to incorporate the fat into the flour (nowadays I use the whisk attachment on my mixer for this step but I don’t recommend this unless you’ve had more experience with pie crust). Once it looks like coarse sand, you can start adding the ice water a tablespoon at a time (the less water the better). You’ll want a few butter/shortening streaks throughout your pie. This creates little fat pockets giving you an extremely flaky crust.
- If you have a pizza stone (or even a metal baking sheet), heat it up in the oven and place the pie right on top of its heated surface. This makes sure you won’t get any soggy crusts.
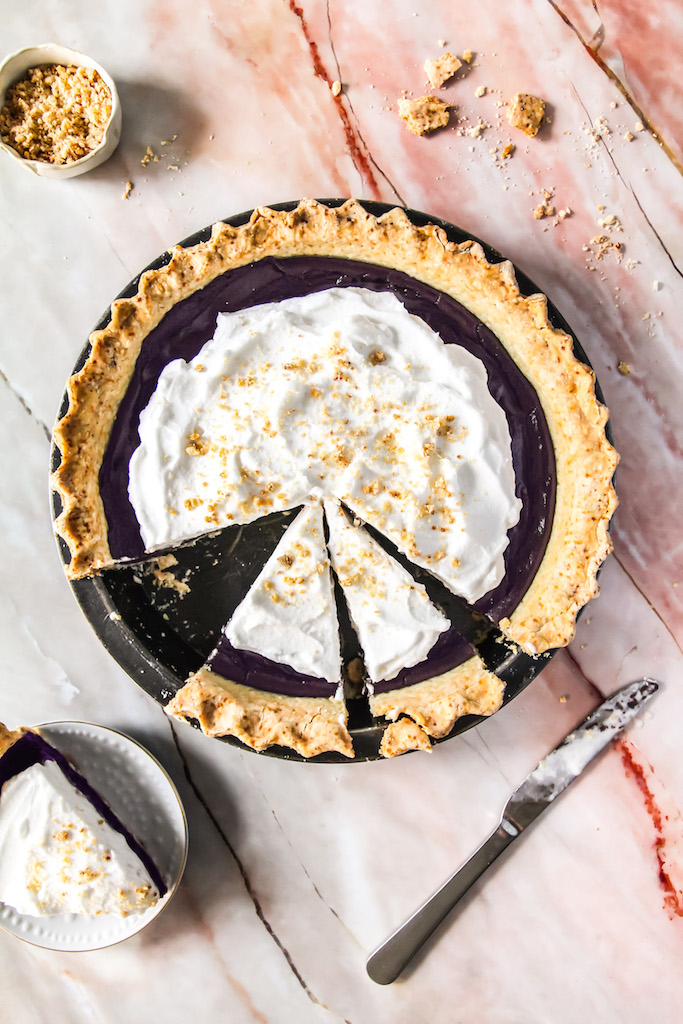
I know I put a lot of stuff in this post but I wanted to make sure to set you up for success. In short, this pie is pretty easy to make, a showstopper with its purple hue and oh so yummy to eat. Let me know if you try making this. I would love to hear from you!
Purple Ube Pie with Whipped Coconut Cream
Ingredients
Pie Crust
- 292 g (2¼ cup) all purpose flour plus extra for dusting
- 2 tsp white sugar
- ½ tsp salt
- 88 g (7 tbsp) unsalted vegan butter cold, cubed
- 55 g (5 tbsp) vegetable shortening cold, cubed
- 4-6 tbsp ice water
Purple Ube Filling
- 250 g (1½ cup) coconut sugar
- 360 mL (1½ cup) full-fat canned coconut cream refrigerated overnight, white cream only
- 640 g (2¾ cup) mashed ube
- 1 tsp vanilla
- ½ tsp ube extract optional
- 1 tsp ground cinnamon
- 4½ tbsp cornstarch
Coconut Whipped Cream
- 1 can (14oz) canned coconut cream refrigerated
- 1 tbsp maple syrup or to taste
- 1 tsp vanilla extract
Instructions
Pie Crust
- Place all the dry ingredients in a large bowl and give it a quick whisk. Cut in the shortening and butter into the flour using a pastry cutter or fork until the mixture looks like coarse sand and there are a few small lumps of butter/shortening. Add in the water 1 tablespoon at a time until it becomes a cohesive dough. You can also use the warmth of your hands to help bring the dough together. If your dough seems to be too warm, wrap the dough in plastic wrap and refrigerate for 10 minutes. (I usually can roll it out straight away)
- Place the dough onto a lightly floured surface and roll until ⅛" thick and about 12" in diameter. Transfer the dough to 9" pie plate. Gently pressing it into the edges of the pan.
- Using a fork, dock (make holes) the crust all over including the sides to prevent the crust from bubbling. Crimp the crust to your preferred decorating edge. Sprinkle 1 tsp of flour over the crust and leave in the fridge to rest for 30 minutes.
Ube Filling
- Preheat oven to 350°F (180°C). Blitz all the filling ingredients in the blender. Strain the mixture and pour into the prepared crust.
- Place your pie on the lowest rack of your oven and bake for 1 hour. If the crust begins to brown too much before the filling is cooked, loosely cover the pie with foil. The pie is done when the center is slightly jiggly but has set. Leave to cool.*
Whipped Coconut Cream
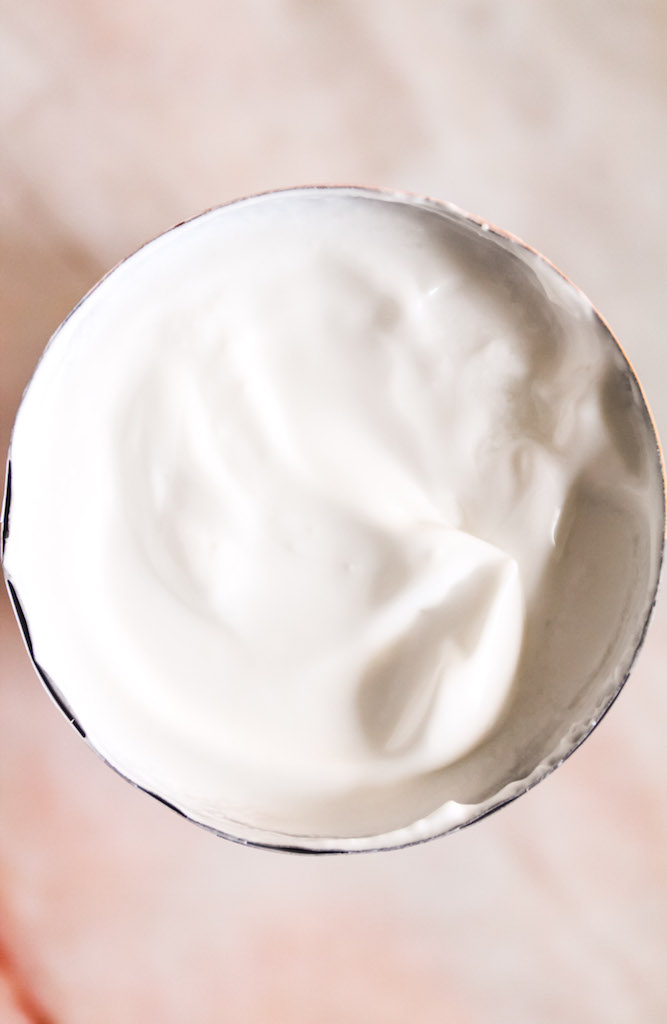
- In the bowl of a stand mixer fitted with the whisk attachment, scoop the white part from the canned coconut making sure to avoid the liquid at the bottom. Whip the coconut cream on high until it reaches a firm peak. Whisk in the syrup and vanilla. Top the cooled pie with the whipped cream then sprinkle some pie crust crumbles/toasted coconut. Serve immediately.
Notes

Some items you might need
Disclosure: As an Amazon Associate I earn from qualifying purchases meaning if you use a link to buy something, I may get a commission. All opinions are my own and I only recommend products that I would buy/use myself. Thank you so much!


[…] one is to make the pastry dough which is a tad easier than my go-to pie crust recipe. I use olive oil as my base fat for its flavor which complements the pears very well. Gather all […]
[…] Make sure when making the crust to use cold butter and ice water to prevent it from melting on you. For more in depth tips, check the tips section of this page. […]
[…] sure to not overmix your dough. Just like making pie crust, you should be able to see pea-sized chunks of butter embellished throughout the dough. If […]